Are you just getting started with Google AdSense or are you thinking about applying for membership to the AdSense Program? This page will help you get familiarized with Google AdSense by covering the basics and providing step-by-step instructions on how-to create your first Google AdSense ad unit.
First of all, you are going to need an approved Google AdSense Account. The reason I say ‘approved’ is because Google requires that Google AdSense Publisher’s first submit an application before their account is approved and ready for use. Remember that you can easily be denied for Google AdSense. In order to improve the chances of your application being approved, follow the guidelines below before submitting your application:
- Make sure your website has been online for a minimum of 180 days.
- Make sure that your website has genuine content.
- Your website should be informative, useful, accessible and responsive.
- It’s beneficial to already have several indexed pages in Google, Bing and Yahoo.
- Your site will immediately be denied approval if it contains any of the following types of content: illegal activity, pornography/adult material, software piracy etc.
If your application gets denied, don’t worry it’s not the end of the world. Google usually provides specific reasons why your application was denied in an email you will receive. The good news is you can correct the issues listed in the denial email and then submit your application again and likely get approved!
Creating your First Ad Unit with AdSense
Now that you have been approved for Google AdSense and are logged into your account, you are ready to create your first ad unit! Creating a new ad unit is easy, just follow the steps below:
- Click on the ‘My Ads‘ link in the navigation panel.
- Click on the ‘
 ‘ button to create your ad unit.
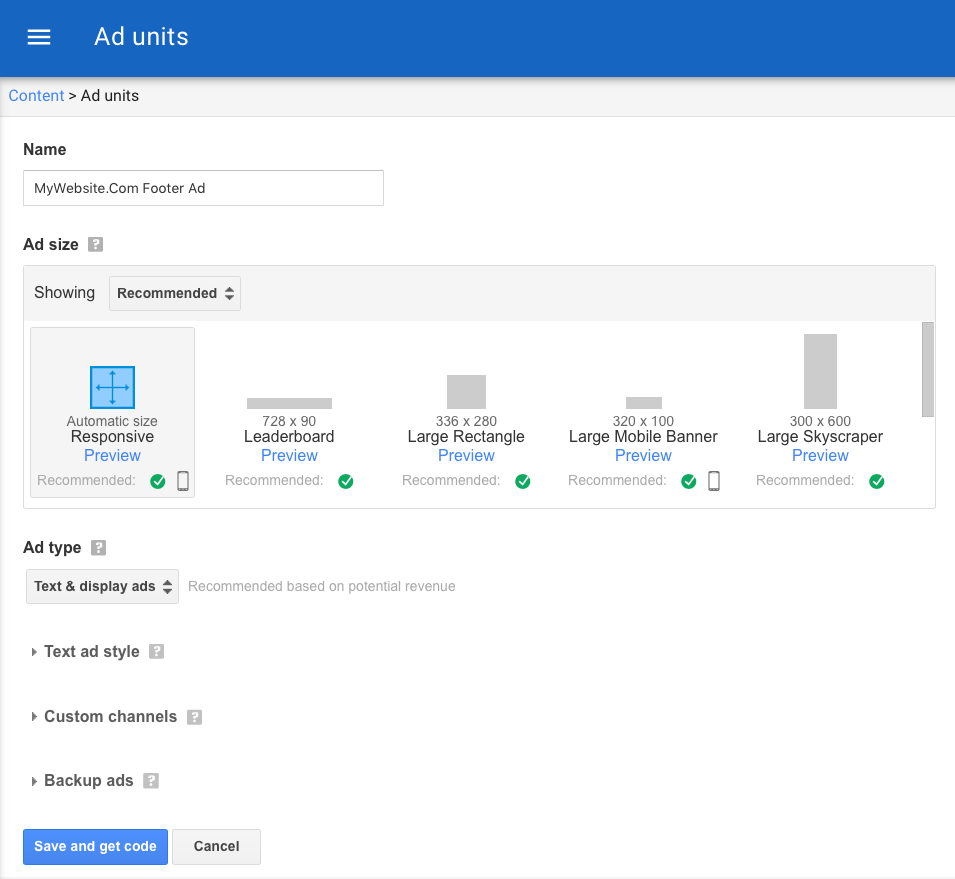
 - You will be asked to provide a name for your ad unit. It’s best to give your ad unit a descriptive name and perhaps include the domain of the website it will reside on.

You can choose whether or not you want text and display ads, text ads only or display ads only. Lastly you can decide whether or not you want to take advantage of the AdSense channels feature that you can utilize for grouping your ad units. Once you are done setting all of these options how you want them click on the ‘Save and get code’ button.
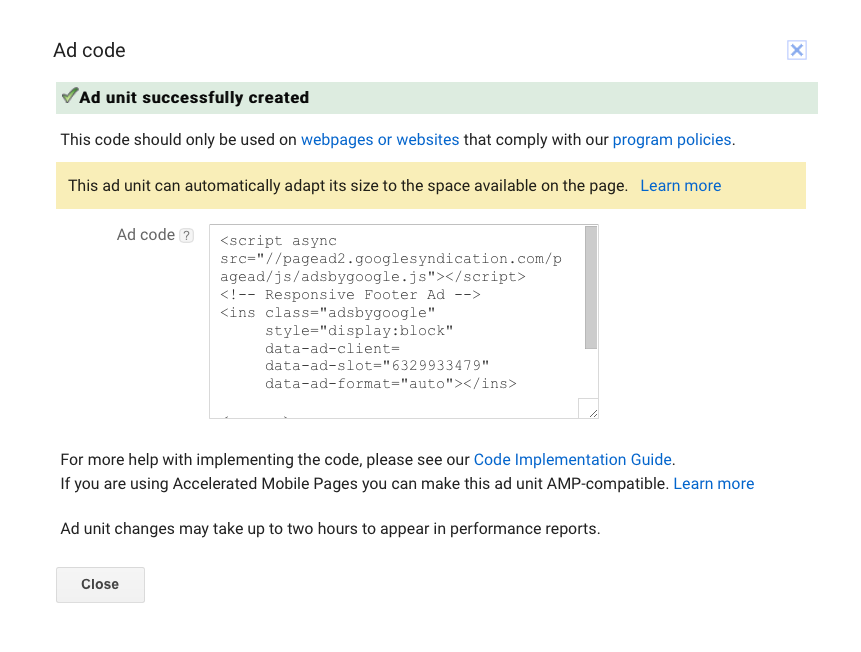
- Next your new AdSense Units code will be displayed. AdSense uses JavaScript to deliver the AdSense ads on your website. Select all of the code and copy it to your clipboard.

- Now you are ready to publish your new AdSense unit. All you have to do is paste the AdSense unit code in the area of your webpage that you want it to be displayed. Remember if you are using WordPress to always paste your AdSense code at the template level (header.php, page.php, footer.php) as WordPress will often strip JavaScript code from your posts and pages for security reasons.
Important Notes: New AdSense units will not display immediately after they have been created. It generally takes anywhere from 5 to 15 minutes after you have created your AdSense unit before it will start displaying on your website. Never under any circumstances should you click on your own AdSense units. If you get caught for click fraud your AdSense account can be terminated right away.

